Instructions: Create a Finokapi stylesheet in DATEV

This guide describes how to create the Finokapi format template for SUSA export yourself in DATEV. This alternative is useful if you don't want to import our stylesheet template.

Step 1: Open ASCII export in DATEV

Prerequisite: First open the ASCII export window in DATEV, as described in step 1 of our standard export guide:

  • In DATEV Workstation, open a financial year of the desired accounting client.
  • In the top left menu, click on “Inventory” -> “Export” -> “ASCII Data”.

Step 2: Create a new format

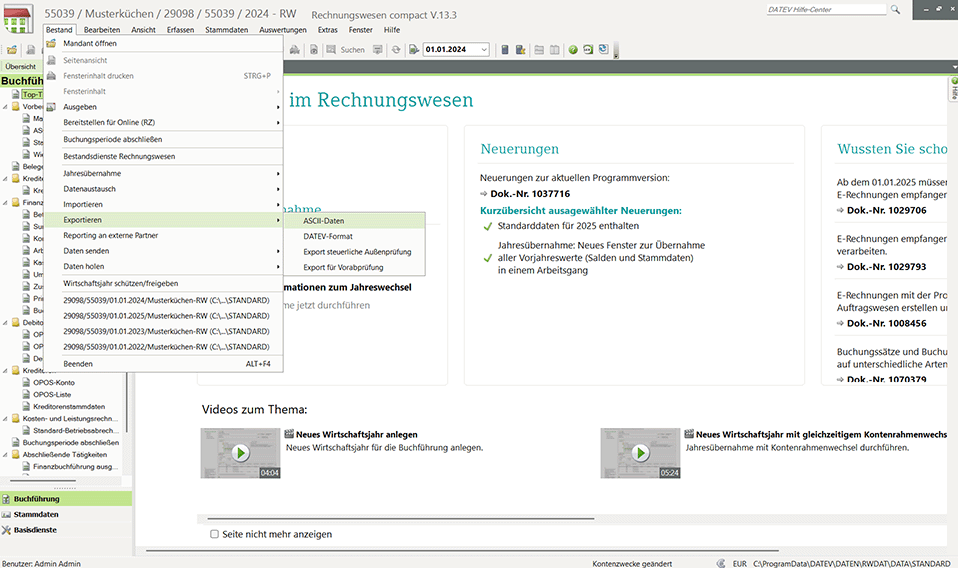
Before you create a new format, you must select the correct output format in the format selector:

  • In the “Format selection” area on the left under the “Totals and Balances” folder, select the format “Totals and Balances” out
  • Click on the drop-down menu at the top right “Format Management”
  • Select “Create a new format”

Step 3: Name the format and choose a template

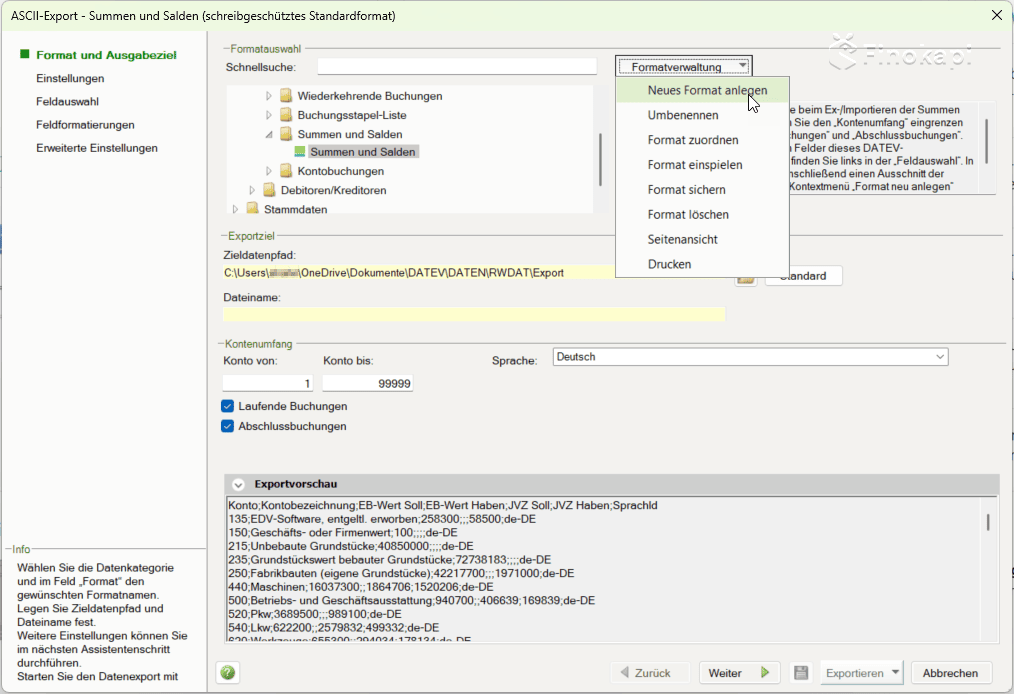
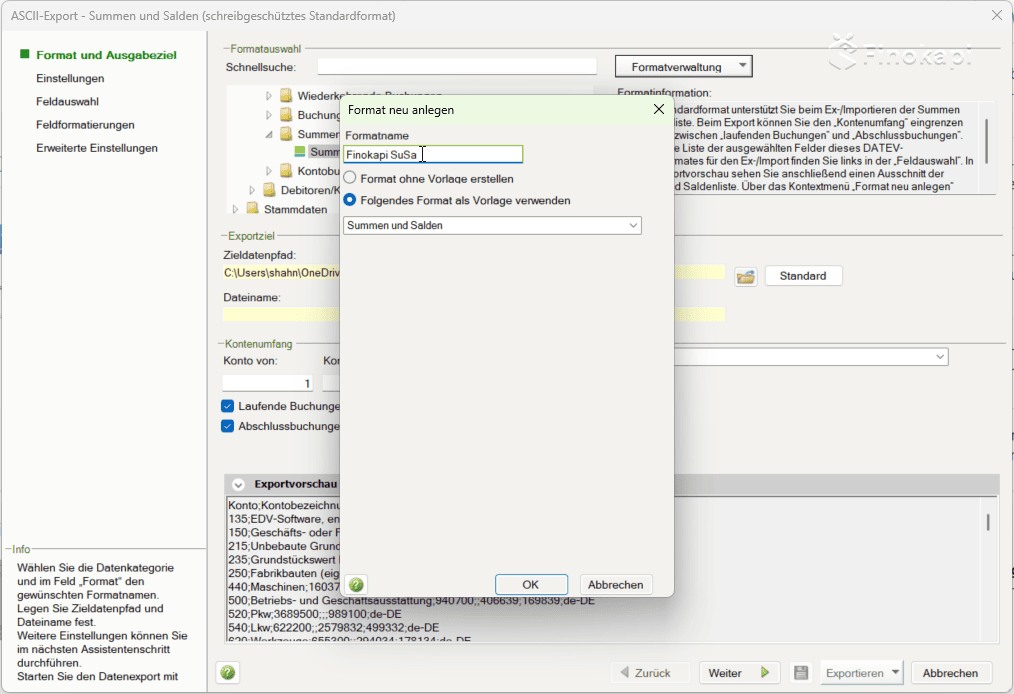
A new dialog box opens for creating formats:

  • Type as format name: Finokapi SuSa
  • Select the option “Use the following format as a template”
  • In the drop-down below, select “Totals and Balances”
  • click on “OK”

You can't see “Totals and Balances” in the drop-down menu? Please make sure that you have first selected the “Totals and Balances” format in step 1 under “Format selection” before you click on “Create new format”.

Step 4: Adjust settings

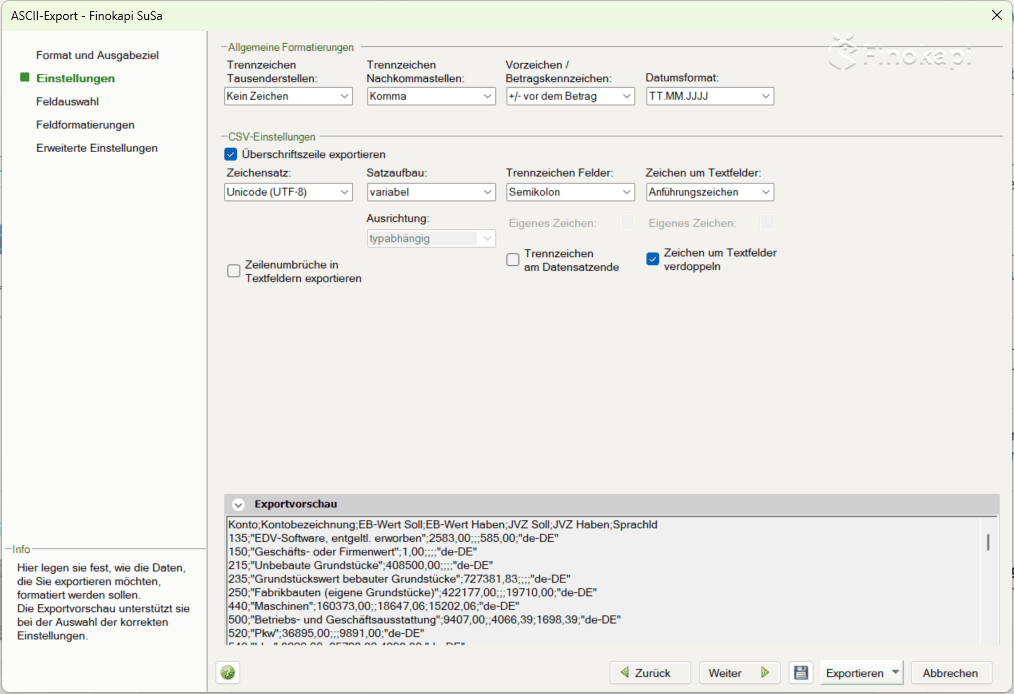
After creating the format, you will end up in the “Settings” area. Some values must be adjusted here so that the export format is compatible with Finokapi.

Starting position: This is what the standard configuration, which was adopted from the DATEV format, looks like.

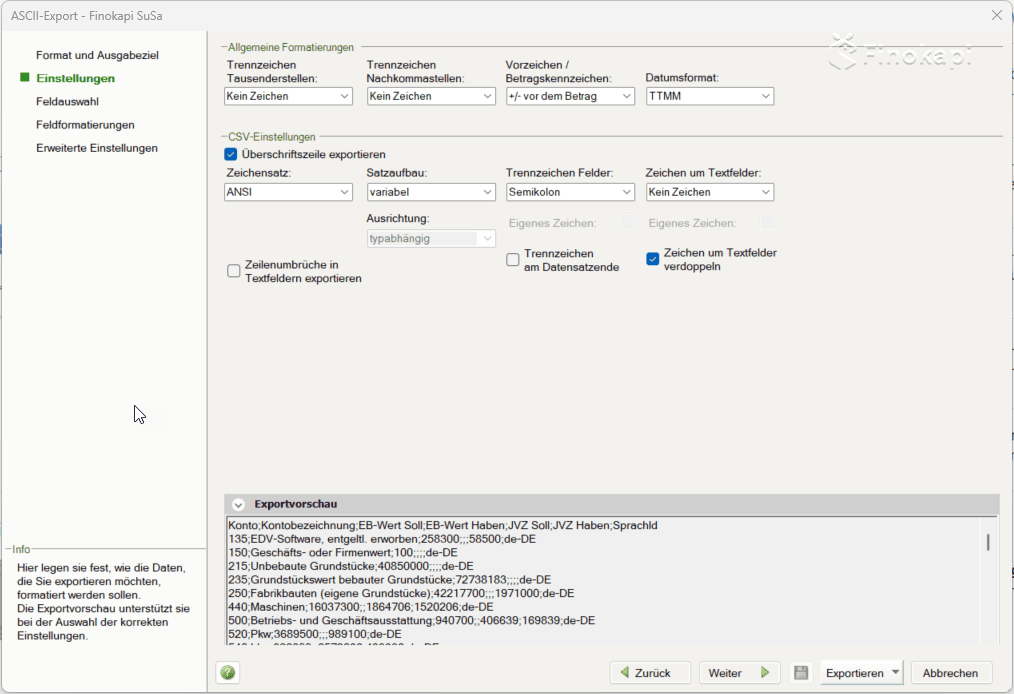
Make the following changes:

  • Separator after decimal places: from “Kein Zeichen” to comma modifying
  • Date format: from “TTMM” to DD.MM.YYYY modifying
  • character set: from “ANSI” to Unicode (UTF-8) modifying
  • Characters around text boxes: from “Kein Zeichen” to quotation marks modifying

Note: The initial view may vary depending on the DATEV installation. Make sure that the settings look like the target image at the end.

Target image: This is what the settings should look like after the adjustments.

Step 5: Adjust field selection

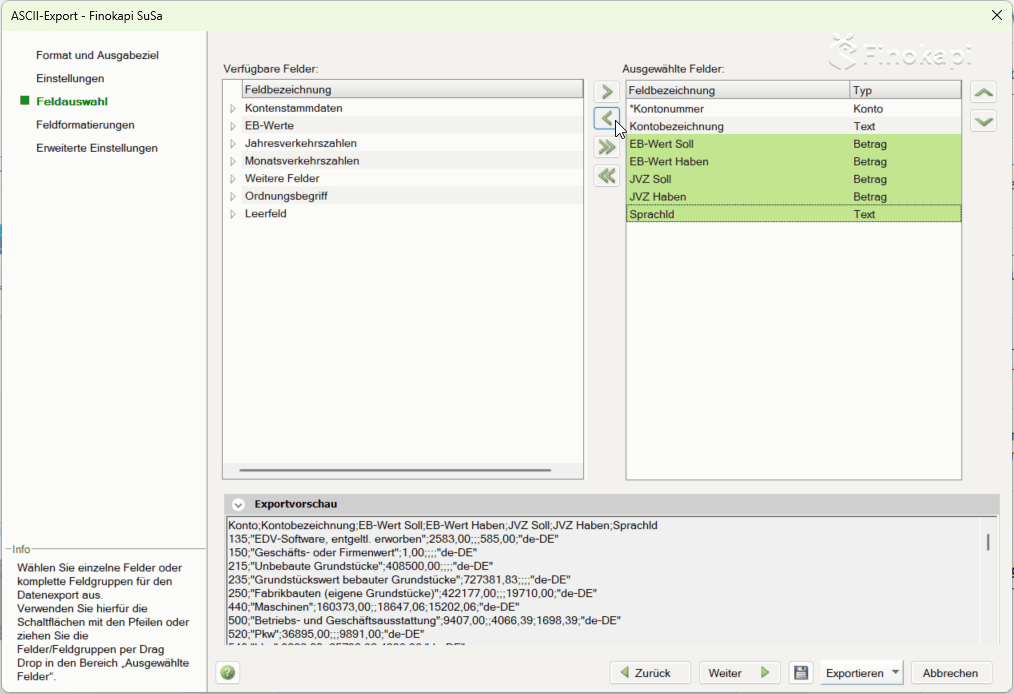
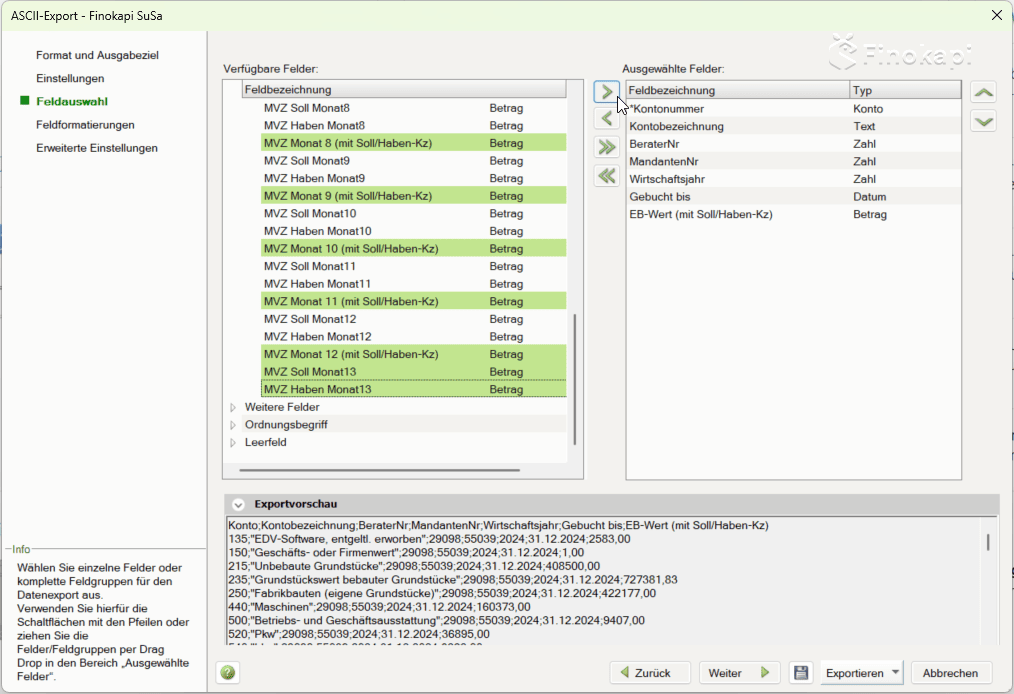
On the left, click “Field selection”. In this area, you define which data fields should be included in the export file. You can see the available fields on the left and the currently selected fields on the right.

Starting position: The DATEV template has already selected some fields that we do not need (e.g. annual traffic figures).

Remove unnecessary fields:

Mark the following 5 fields on the right (from “EB value should” to “language ID”) and click on the left arrow to remove them:
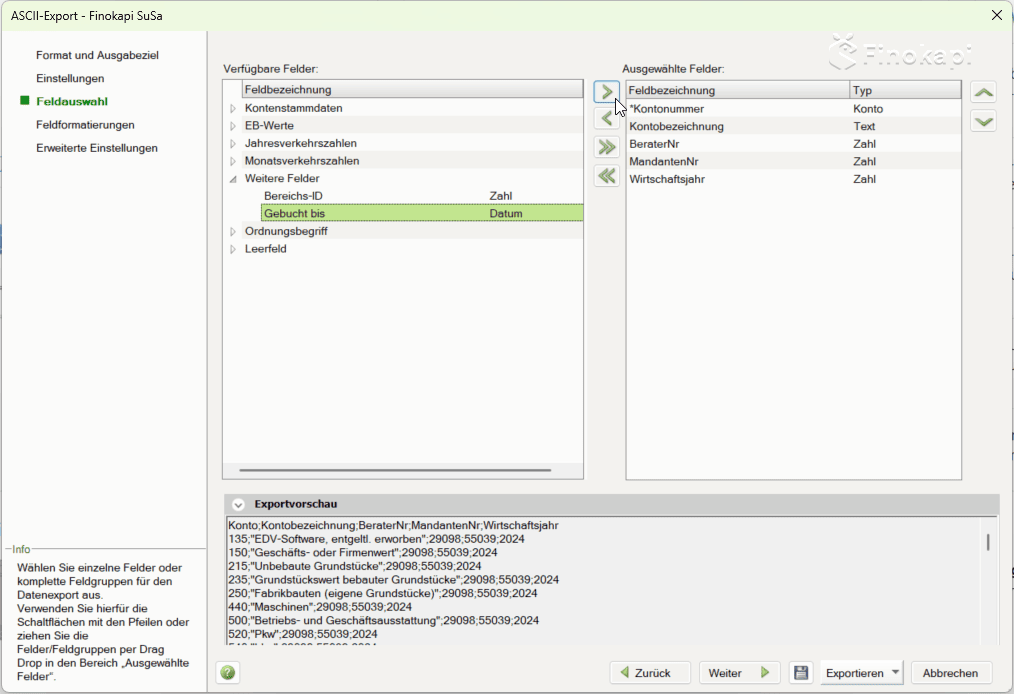
  • EB-Wert Soll
  • Have EB value
  • JVZ Soll
  • JVZ Haben
  • languageID

Add term fields:

Open the folder on the left “Definition of order” and select the following three fields. Then click on the Right arrow to add them:

  • BeraterNr
  • MandantenNr
  • Wirtschaftsjahr

Add “Booked by”:

Open the folder on the left “More fields” and choose “Booked until” off. Click on the Right arrow.

Add EB value:

Open the folder on the left “EB values” and choose “EB value (with debit/credit concentration)” off. Click on the Right arrow.

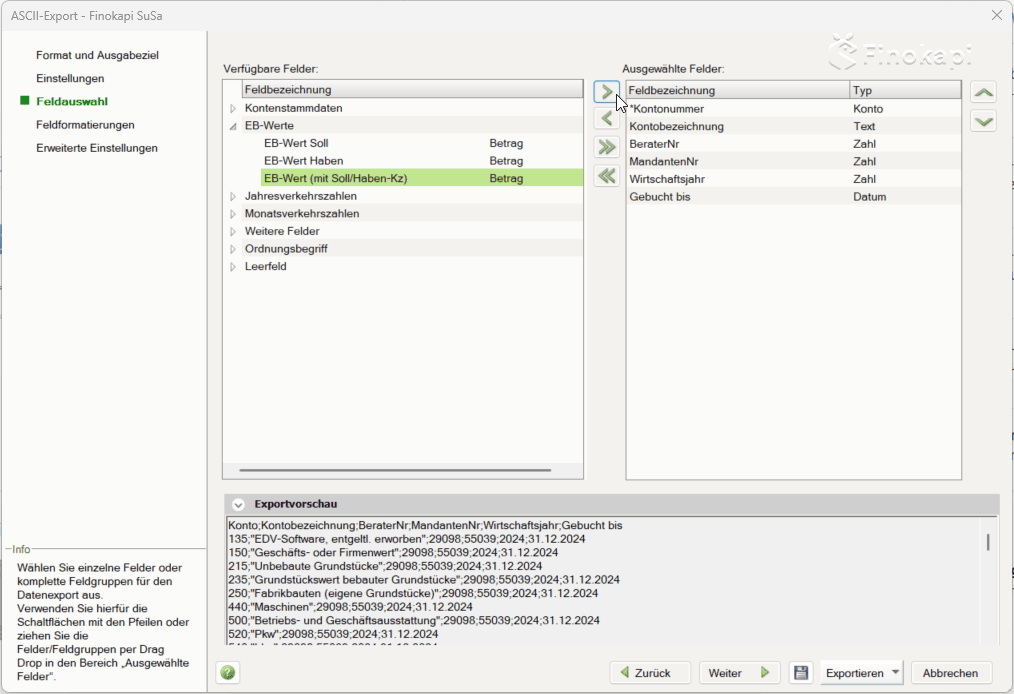
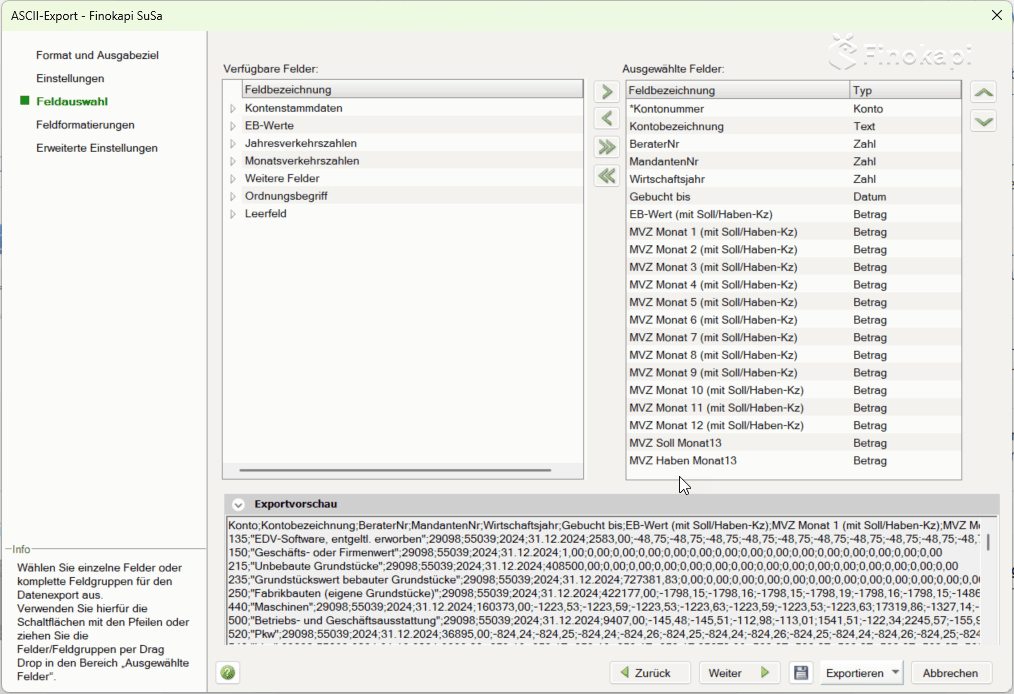
Add monthly traffic figures:

Open the folder on the left “Monthly traffic figures” and select all of the following fields:

  • MVZ month 1 to 12 (in each case the variant “with debit/credit concentration camp”)
  • MVZ Soll month13 and MVZ Have Month13 (these are only available as separate fields)

Click on the Right arrow to add them all.

Target image: This is what the field selection should look like at the end.

Step 6: Adjust field formatting

On the left, click “Field Formatting”. Here you can adjust the column headers for the CSV export file. The relevant column is “Abw. Field name” (Different field name).

Starting position: The standard DATEV names are pre-set.

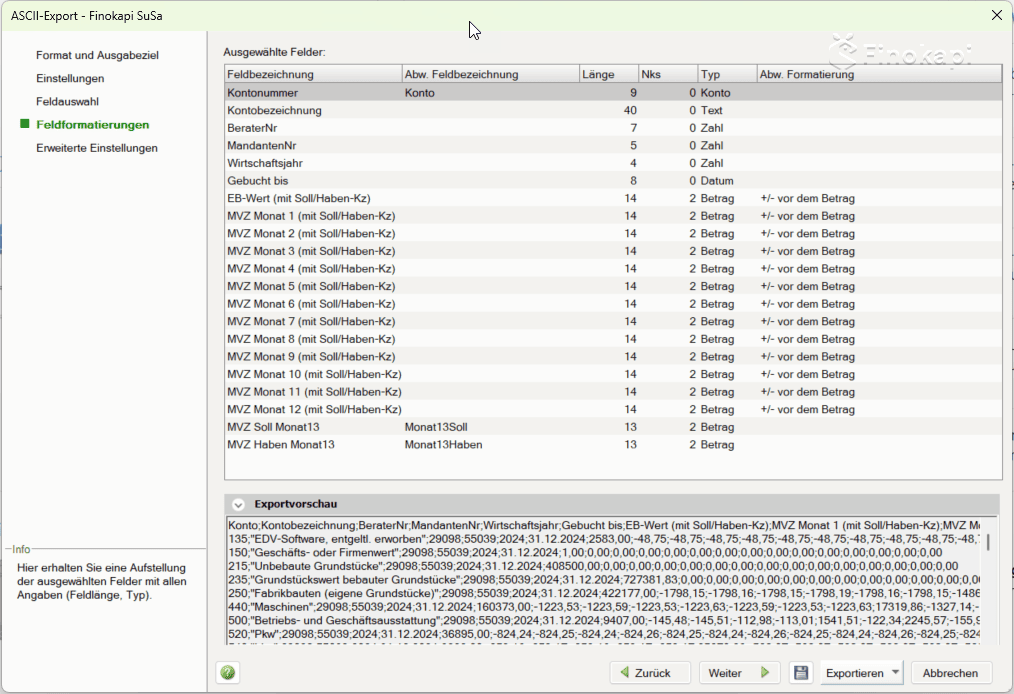
Click in the column “Abw. Field Name” and enter the following values:

  • With Account number: remove the existing “account” (leave field empty)
  • With EB value (with debit/credit concentration): EB value enter
  • With MVZ month 1 (with debit/credit concentration camp): MVZ1 enter
  • With MVZ month 2 (with debit/credit concentration camp): MVZ2 enter
  • ... and so on until MVZ month 12: MVZ12
  • With MVZ Soll Month13: MVZ13 S enter
  • With MVZ Have Month13: MVZ13 H enter
Target image: This is what the field formats should look like at the end.

Step 7: Save format

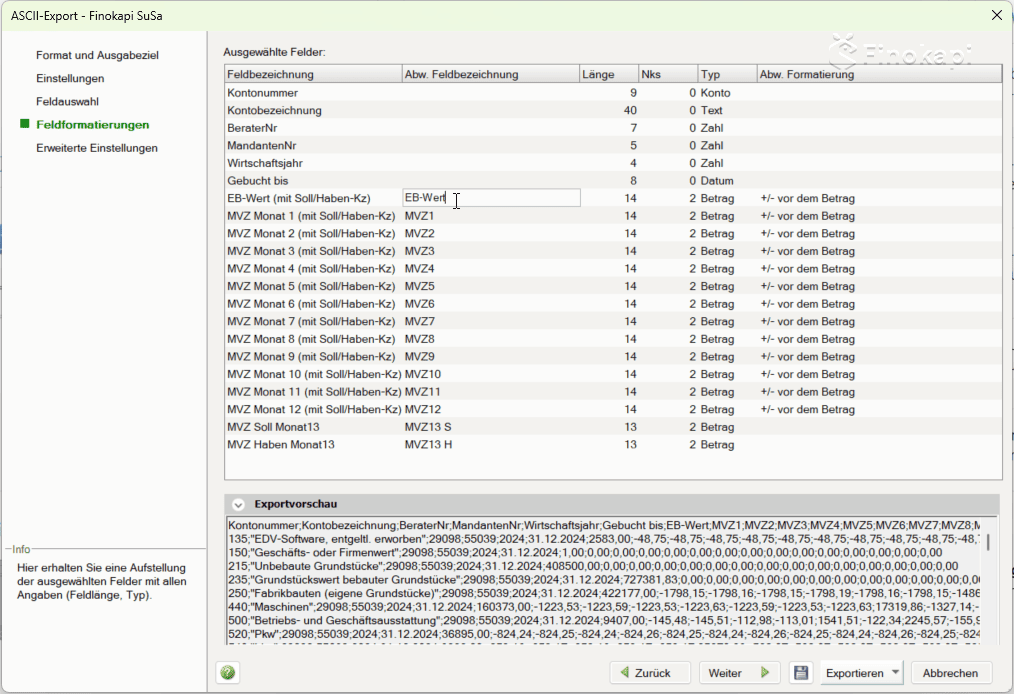
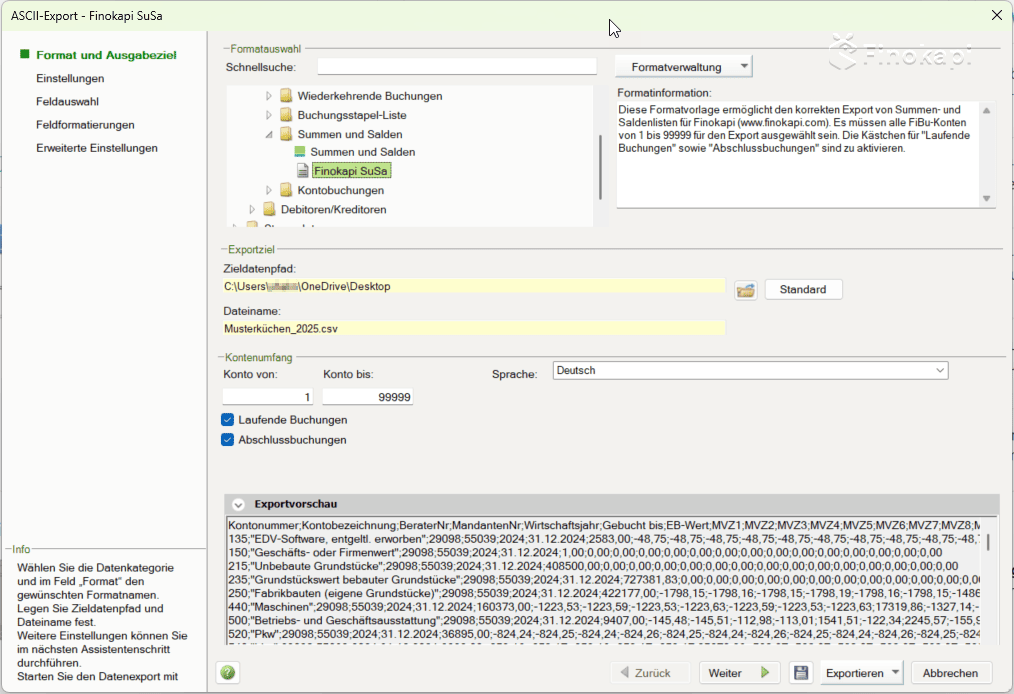
On the left, click “Format and output destination”to return to the overview. In the format selection under “Totals and Balances”, select the format “Finokapi SuSa”.

Starting position: The “Format Information” field still contains the text from the DATEV standard format, which is incorrect.

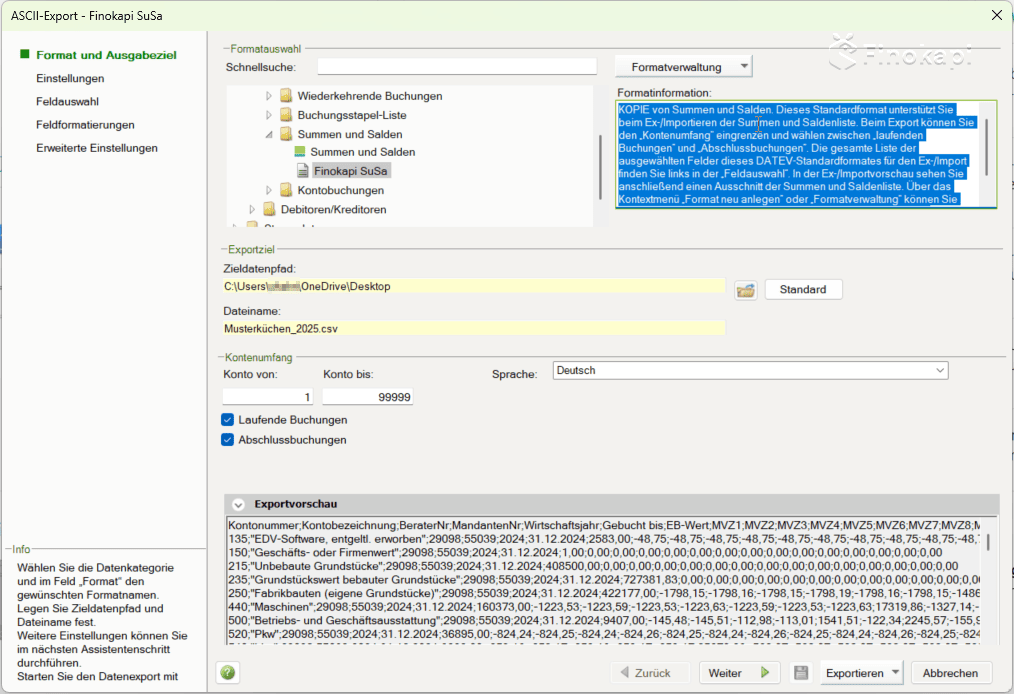
Adjust format information:

  • Click in the box “Format information” right
  • Mark all text with Ctrl+A
  • Add the following text:

This format template enables the correct export of total and balance lists for Finokapi (www.finokapi.com). All FIBu accounts from 1 to 99999 must be selected for export. The boxes for “Current bookings” and “Final bookings” must be activated.

Save format:

  • First click with the mouse somewhere outside the text field (e.g. on “Finokapi SuSa” on the left)
  • Then click on the small floppy disk icon next to “Export” to save the format
  • Confirm the dialog with “Yes”

Step 8: Save format as backup (optional)

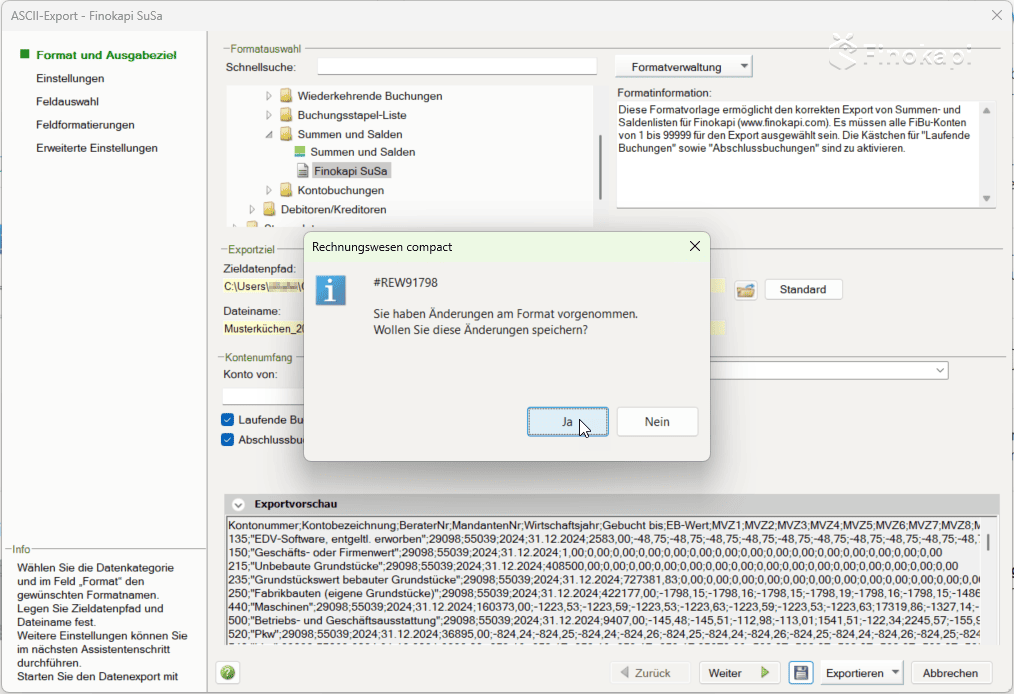
If you want to save the created stylesheet as a backup file:

  • Make sure that “Finokapi SuSa” is selected in the format selection
  • click on “Format Management”“Save format”
  • Select a storage location on your computer

This way, you have saved the stylesheet as a file and can import it to other DATEV installations if required.

That's it! 🎉 The Finokapi stylesheet is now set up in DATEV and can be used for all future SUSA exports.

Do you still have questions? We're happy to help: support@finokapi.com